安装 Debian 11
使用其他符合 Prerequisites 要求的发行版也行,这里选择 Debian 11,使用最小网络安装镜像。因此,在安装前确保你已经给系统分配了能正常上网的静态IP地址。
推荐配置
CPU:2 Core
RAM:2048 MB
Disk:10 GB
此处安装过程非本文重点,只强调几处关键的地方。
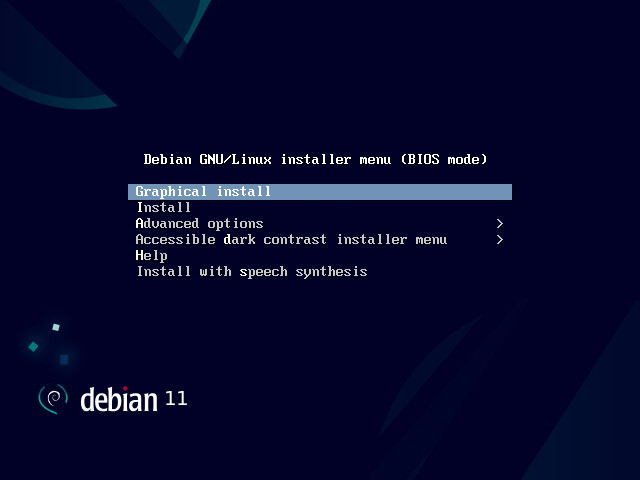
这里选择第二个非图形化安装
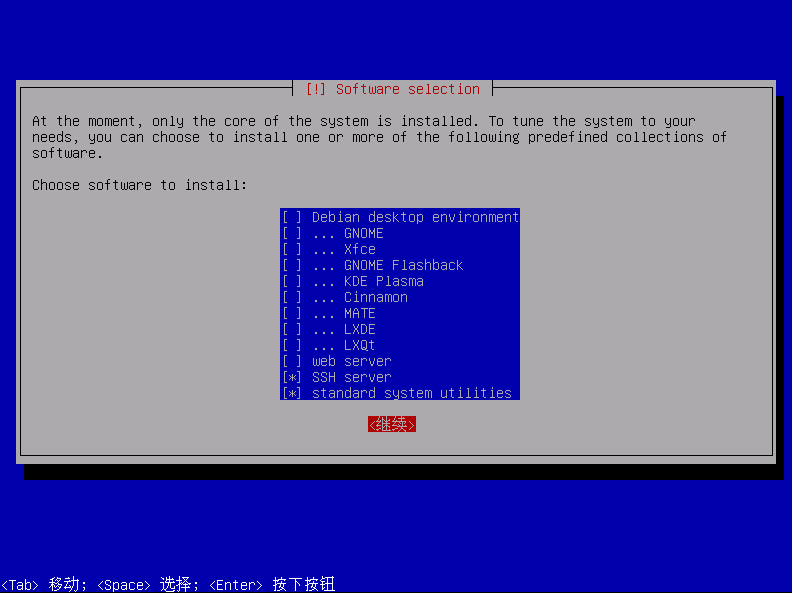
最小化安装选择最后两项即可
就近选择适合自己服务器的 Debian 仓库镜像,我这里选择的是ftp.hk.debian.org。
网络配置静态IP
nano /etc/network/interfaces
auto ens192
iface ens192 inet static
	address 192.168.1.1/24
	gateway 192.168.1.254
	# dns-* options are implemented by the resolvconf package, if installed
	dns-nameservers 223.6.6.6
重启网卡生效
systemctl restart networking
安装 Pi-hole
curl -sSL https://install.pi-hole.net | bash
这里使用的是官方提供的一键安装脚本,安装前确保本机使用的是静态IP地址。安装时可以启用DHCP功能(确保未在路由器等其它地方启用),这边安装仅作为 DNS 使用。启用 Web UI 功能默认会一并安装 FTL,安装完毕后会生成随机密码,可以通过http://IP/admin登录控制台。
若存在防火墙,需放行 53 和 80 两个端口
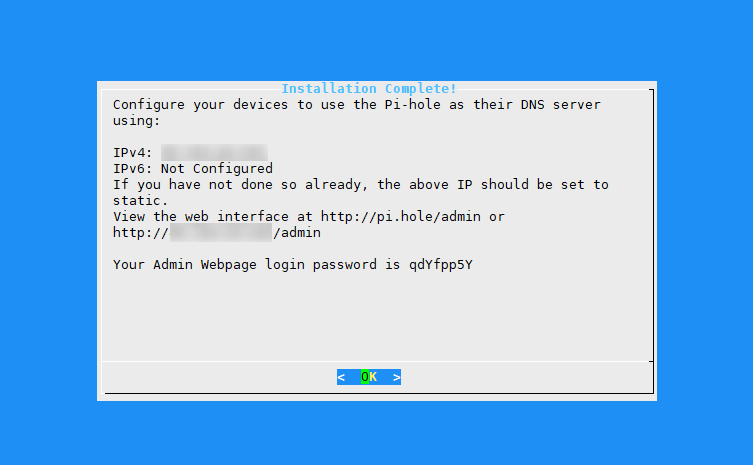
更改 Web 登录密码请在命令行下键入
pihole -a -p
广告拦截
Pi-hole 通过添加本地解析记录和黑白名单的方式,可以很容易的实现“DNS劫持”和“DNS污染”。而广告拦截就是通过“DNS污染”的方式将匹配到的广告域指向了一个黑洞,达到去广告的作用。
这里有两个广告域匹配列表,国外是默认安装时自动配置的。
- 国外:https://raw.githubusercontent.com/StevenBlack/hosts/master/hosts
- 国内:https://anti-ad.net/domains.txt
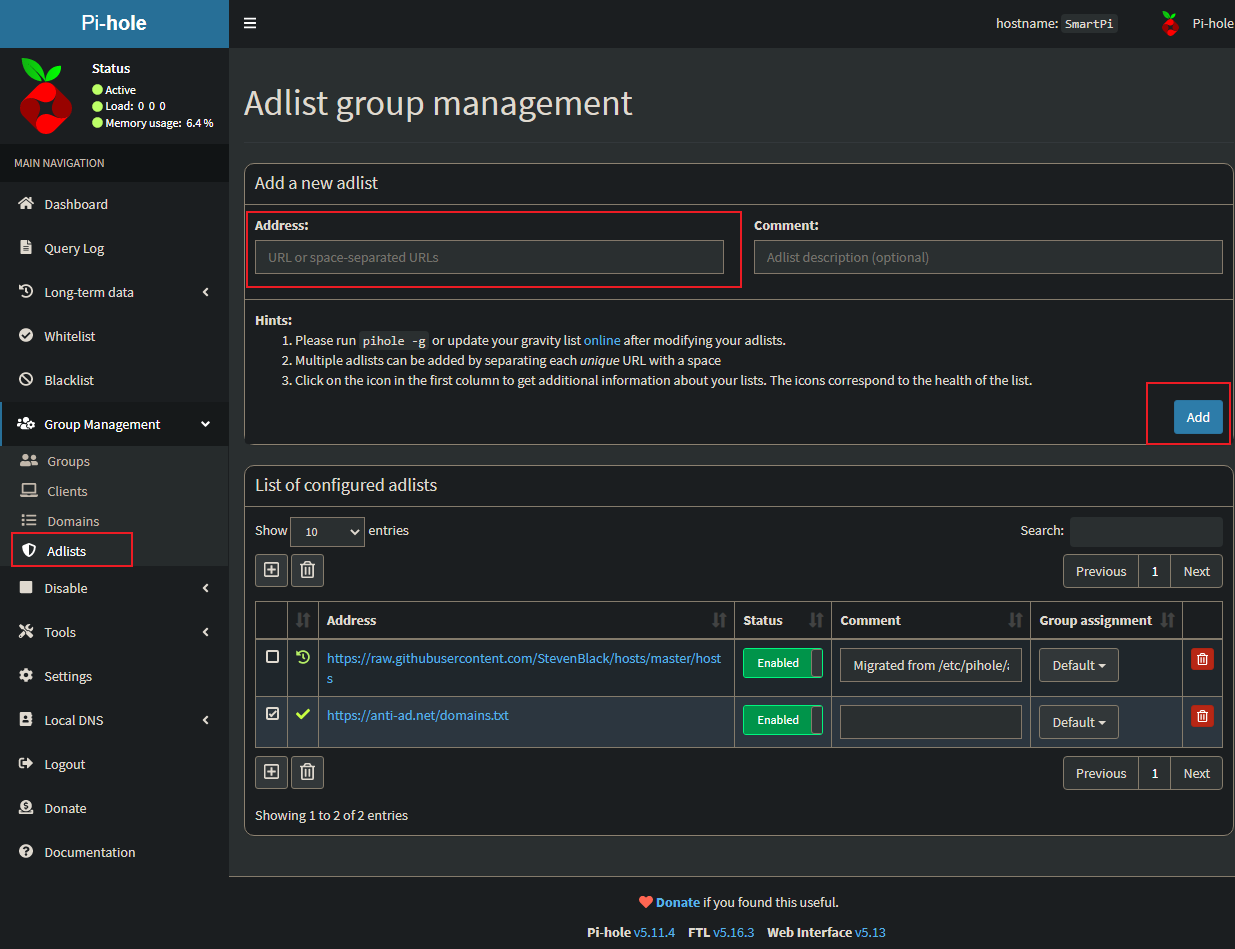
添加好之后,需要更新下规则列表。UI方式在 Tools>Update Gravity 上点击 Update 即可。命令行使用pihole -g
root@SmartPi:~# pihole -g
  [i] Neutrino emissions detected...
  [✓] Pulling blocklist source list into range

  [✓] Preparing new gravity database
  [i] Using libz compression

  [i] Target: https://raw.githubusercontent.com/StevenBlack/hosts/master/hosts
  [✓] Status: Retrieval successful
  [i] Analyzed 136942 domains
  [i] List stayed unchanged

  [i] Target: https://anti-ad.net/domains.txt
  [✓] Status: Retrieval successful
  [i] Analyzed 61361 domains

  [✓] Creating new gravity databases
  [✓] Storing downloaded domains in new gravity database
  [✓] Building tree
  [✓] Swapping databases
  [✓] The old database remains available.
  [i] Number of gravity domains: 198303 (187428 unique domains)
  [i] Number of exact blacklisted domains: 0
  [i] Number of regex blacklist filters: 0
  [i] Number of exact whitelisted domains: 0
  [i] Number of regex whitelist filters: 0
  [✓] Flushing DNS cache
  [✓] Cleaning up stray matter

  [✓] FTL is listening on port 53
     [✓] UDP (IPv4)
     [✓] TCP (IPv4)
     [✓] UDP (IPv6)
     [✓] TCP (IPv6)

  [✓] Pi-hole blocking is enabled
至此,将你的电脑 DNS,亦或是直接将你局域网中的路由器的 DNS 或 DHCP 上的 DNS 地址设置成 Pi-hole 主机IP地址,即可达到全网广告拦截的目的。
安装 SmartDNS
SmartDNS 的特色在于可以设置多个上游 DNS,并从所有查询结果中返回最快的解析记录。支持 UDP、TCP、TLS 和 HTTPS 查询,以及非 53 端口查询。亦可用作域名分流,广告过滤,特定后缀匹配。
这里同样是一键安装,直接在上面的Pi-hole主机上运行即可。
wget https://github.com/pymumu/smartdns/releases/download/Release37.1/smartdns.1.2022.08.18-2327.x86_64-linux-all.tar.gz -O smartdns.tar.gz && tar zxf smartdns.tar.gz && cd smartdns && chmod +x install && ./install -i
编辑配置文件/etc/smartdns/smartdns.conf,主要修改如下配置
#UDP监听端口
bind [::]:7053
#上游DNS
server 119.29.29.29
server 223.6.6.6
server 8.8.4.4
server 1.1.1.1
server-tcp 119.29.29.29
server-tcp 223.6.6.6
server-tcp 8.8.4.4
server-tcp 1.1.1.1
server-tls 8.8.4.4
server-tls 1.1.1.1
server-https https://cloudflare-dns.com/dns-query
#日志文件
log-file /var/log/smartdns/smartdns.log
#缓存记录条数
cache-size 16384
#最小TTL值,单位秒
rr-ttl-min 600
#TTL接近过期时会自动查询并更新缓存结果(与下面不同的是,这会省去了客户端等待DNS重新请求的时间,代价是会消耗更多CPU)
prefetch-domain yes
#TTL过期后会返回 TTL=0 给客户端并重新查询和缓存结果
serve-expired yes
#v4与v6对比取最快结果,默认即为yes
dualstack-ip-selection yes
#针对 IOS 14 系统查询缓慢问题,关闭TYPE65记录查询
force-qtype-SOA 65
修改完之后
systemctl enable smartdns && systemctl restart smartdns
验证 DNS 是否生效
dig www.google.com @localhost -p 7053
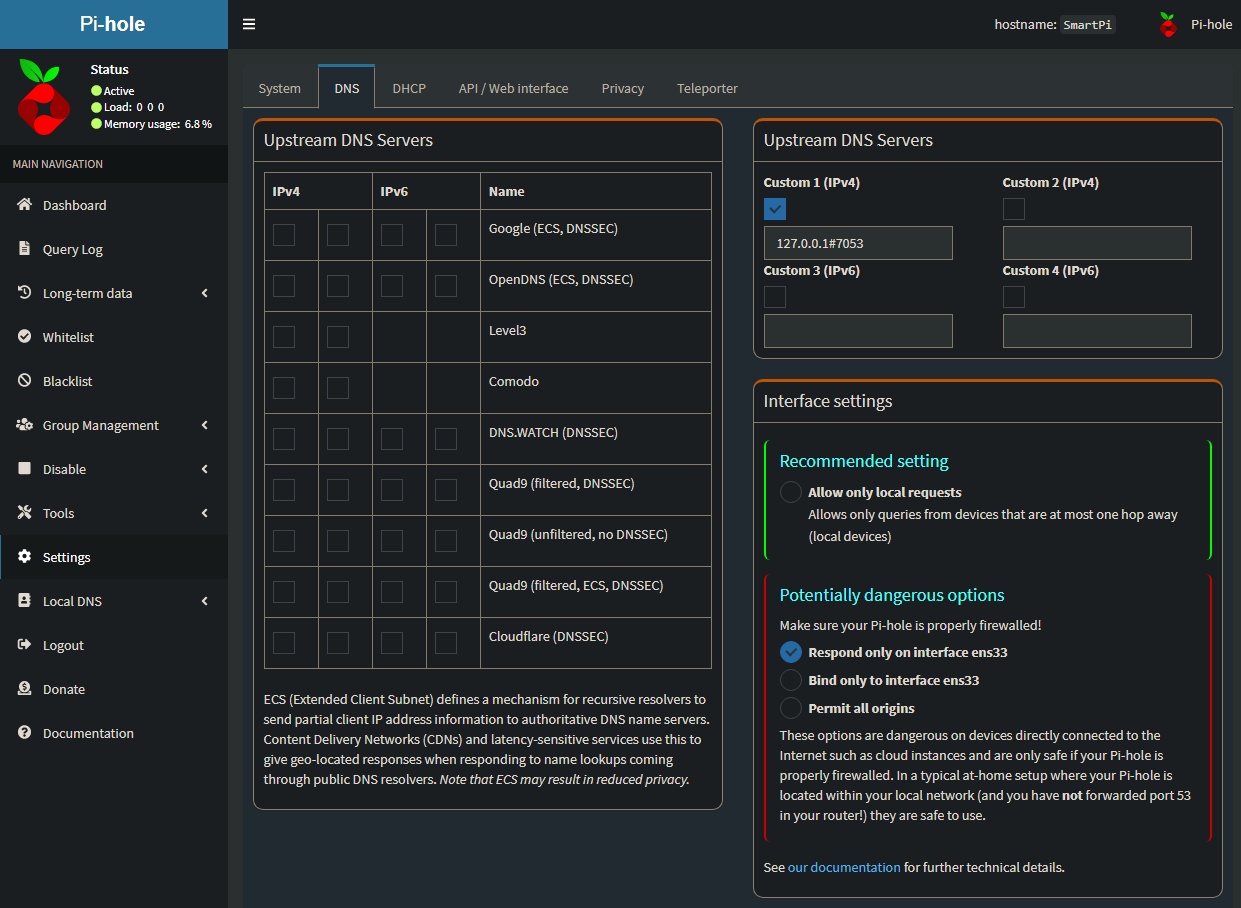
Pi-hole 设置 SmartDNS 作为上游 DNS
小结
无特殊需求,安装完 Pi-hole 亦可直接使用。若非本地安装,无需安装 SmartDNS,其优势在于返回最快记录,也因此需要在更加靠近用户侧安装才会有效果。


评论区